Create a container
Overview
This guide mainly covers the usage on web portal. In addition, you can submit a training job using the web interface, SDK or CLI. This user guide mainly covers the web experience. You can refer to CLI documentation here.
Operation Scenario
Effortlessly manage serverless containers with customizable configurations, persistent volumes, and advanced setup options to optimize your applications.
Prerequisites
- Register a Platform Account:
- Create a Bitdeer AI account.
- Complete KYC Verification:
- Fulfill KYC (Know Your Customer) requirements by providing real-name information to ensure compliance and security.
Operations
- Log in to use AI Studio Console.
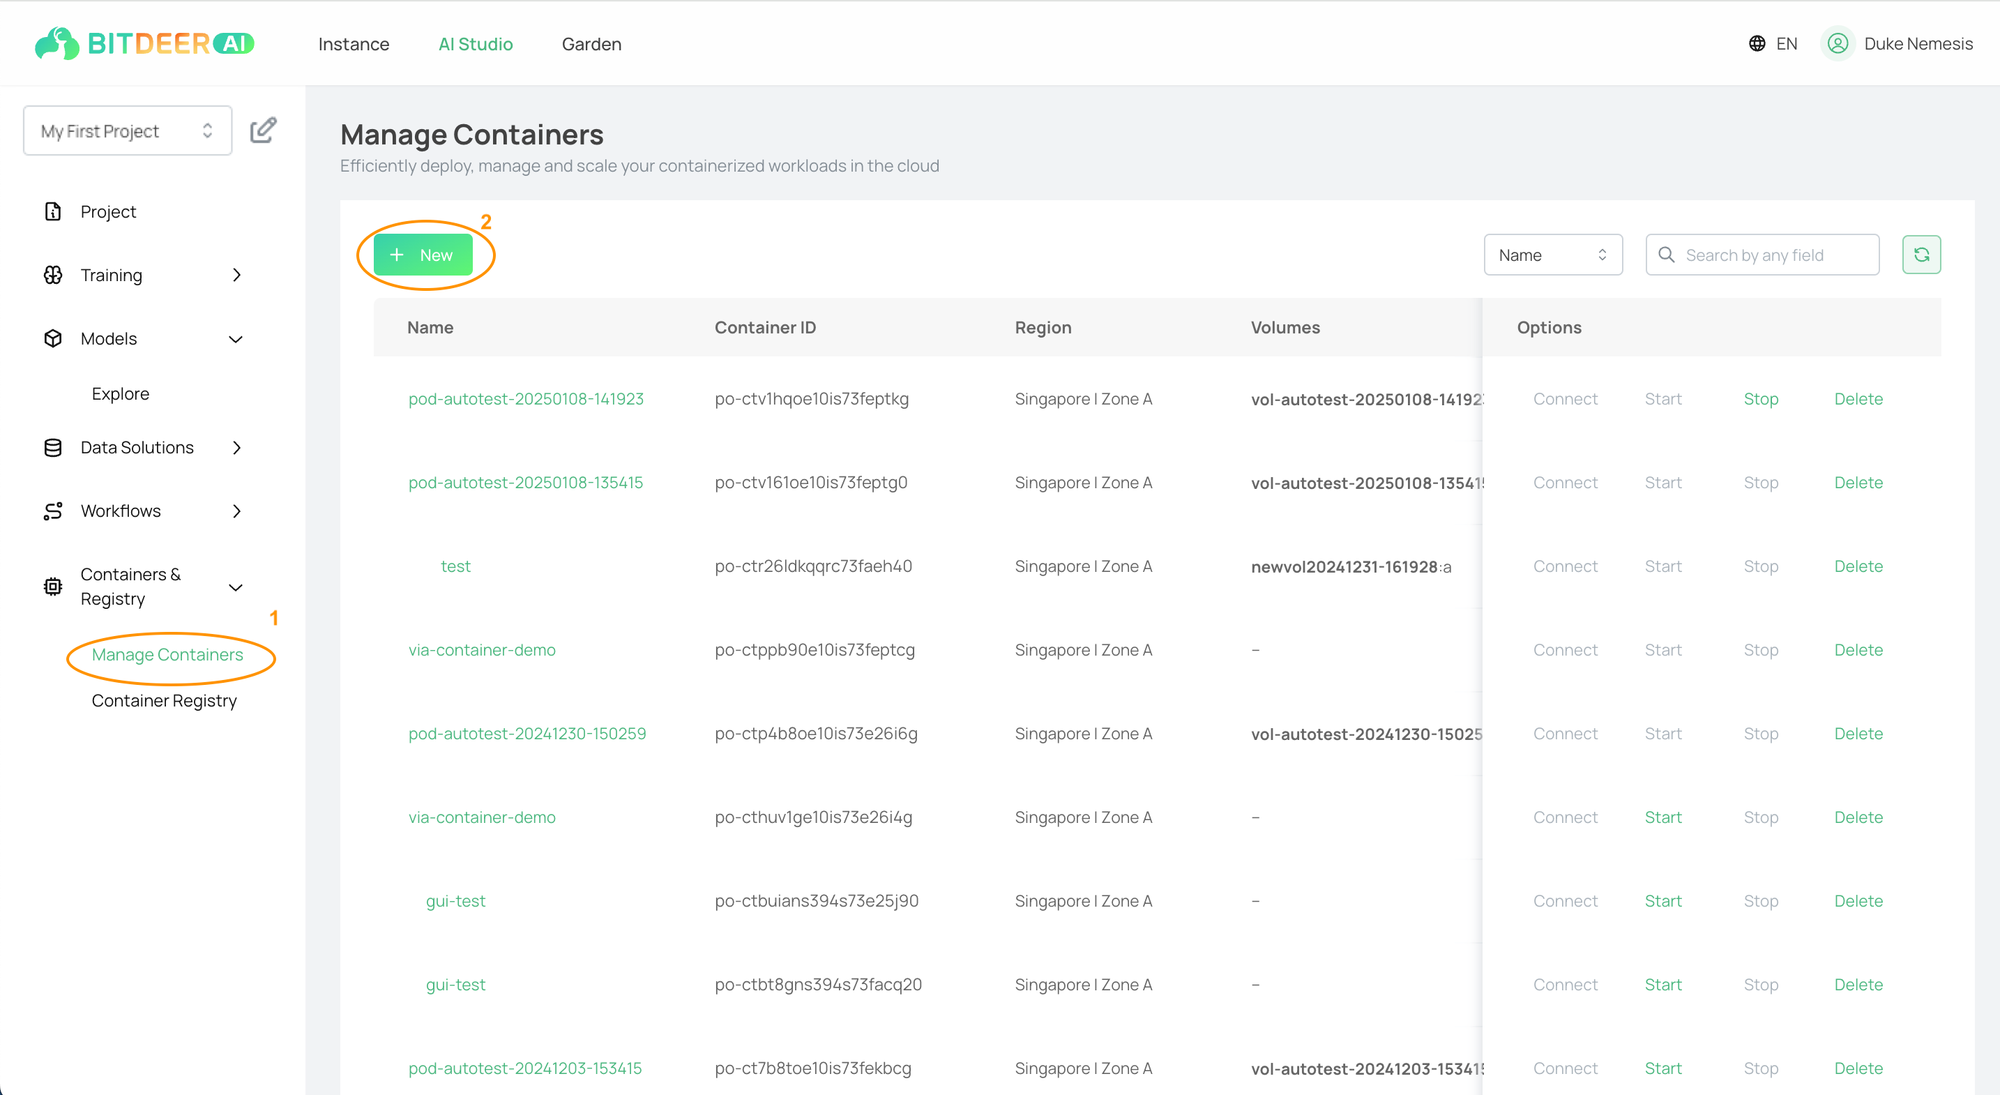
- In the left navigation tree, expand Containers & Registry and select "Manage Containers".
- Click "+New" to proceed with creation.

- Configure the following parameters:
| Configuration Parameters | Configuration Instructions |
|---|---|
| Region |
- Region: Select the closest region to your customer for reduced access delays and improved speed. - Available Zone: If you need to purchase multiple cloud servers, choose different available areas to achieve disaster tolerance. For more information, please refer to Regions and Available Zones. |
| Computing Resource |
Specify the type and number of GPUs or CPUs required for your workload. Check Reserve Resources Now for immediate allocation. For more information, refer to Resource Specifications. |
| Persistent Volumes |
Attach or create volumes to retain data across sessions. Refer to Volume Management for details. |
| Image |
Select an image that exists in Bitdeer AI Registry (BCR). Refer to BCR documentation for more information. |
| Environment Variables |
Set up variables and commands to tailor the container environment to your application needs. |
| Command |
Provide a list of commands (similar to CMD in a Dockerfile) to override the default container entry point. |
| Arguments |
Provide a list of arguments (similar to ARGS in a Dockerfile) to pass to the container during execution. |
- Review your configurations, and click "Launch" to deploy the container.
- Wait for the container status to change to Running in Container Dashboard.