Create Notebook
This guide explains how to create Notebook on our cloud platform. Follow these steps to configure and launch a notebook server using our intuitive user interface.
Operation Scenario
Configure the required machine specifications and persisting volumes to your Jupyter Notebook to quickly run experiments or model trainings.
Prerequisites
- Register a Platform Account:
First, create a Bitdeer AI account. - Complete KYC Verification:
When prompted, fulfill the KYC (Know Your Customer) requirements by providing your real-name information to ensure compliance and security.
Operations
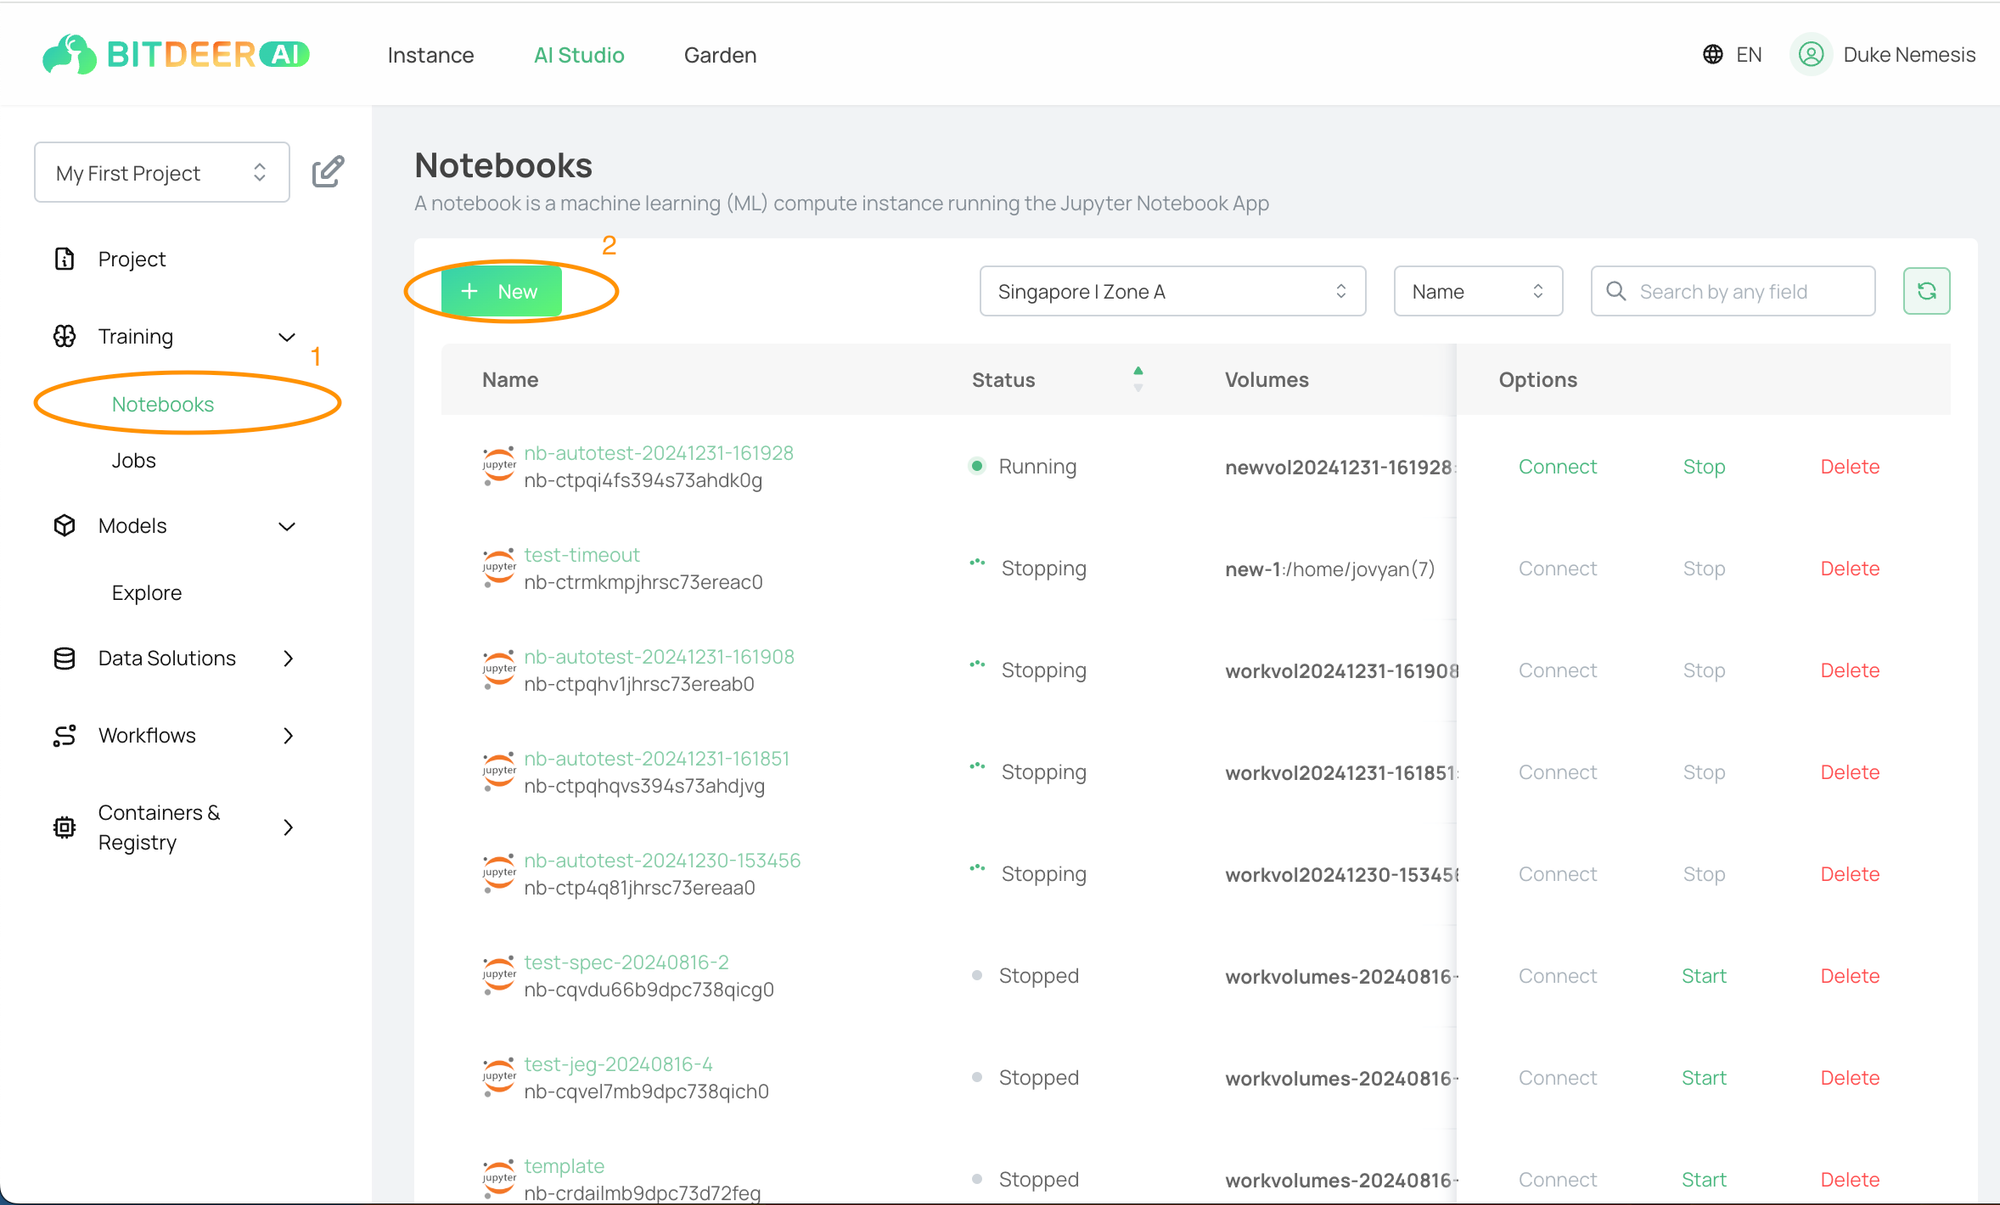
- Log in to use AI Studio Console.
- In the left navigation tree, expand "Training" and select "Notebooks".
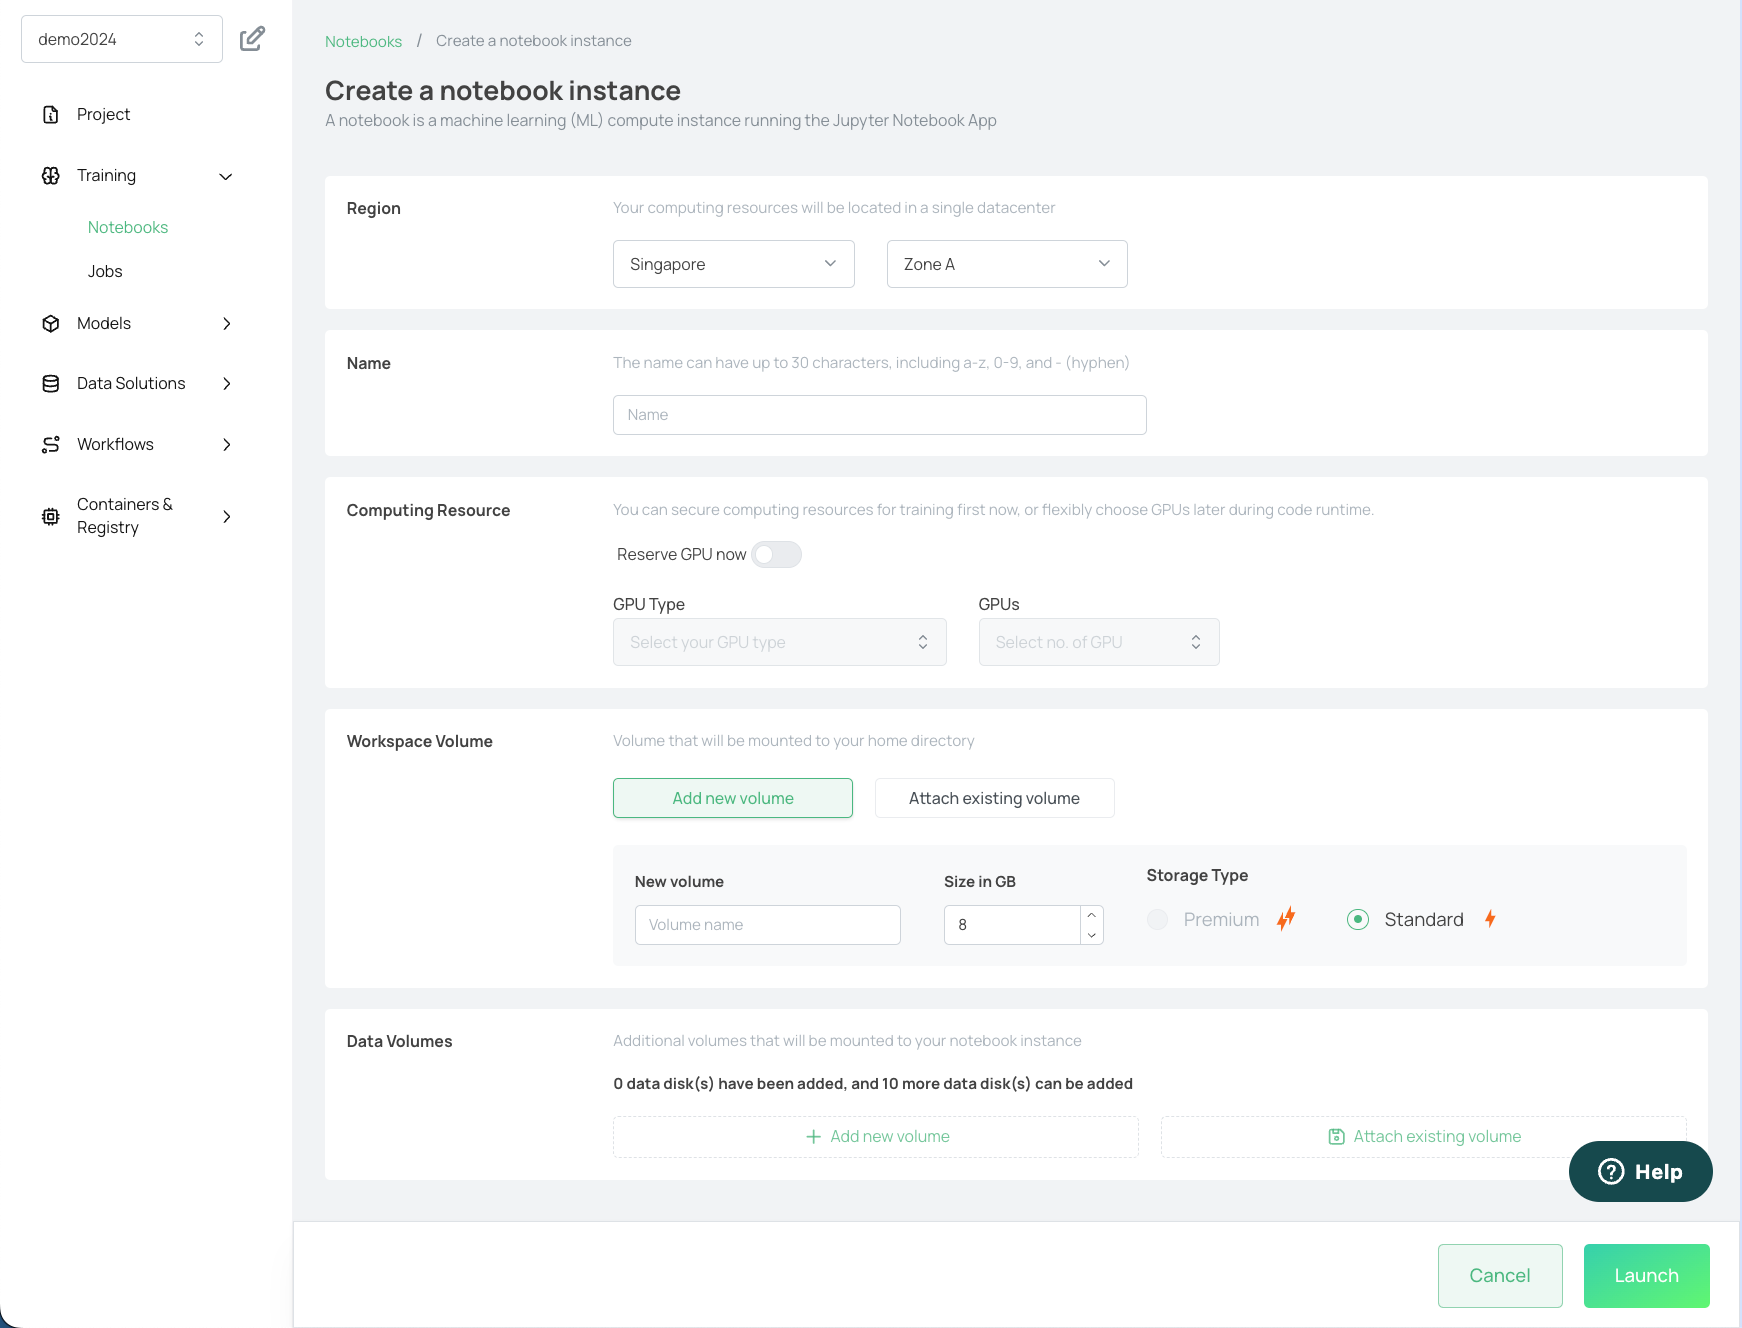
- Click on "New" to proceed to creating a new notebook. Configure the following information according to the page prompts.
| Configuration parameters | Configuration instructions |
|---|---|
| Region |
- Region: It is recommended to choose the region closest to your customer, which can reduce access delay and improve access speed. - Available zone: If you need to purchase multiple cloud servers, it is recommended to choose different available areas to achieve disaster tolerance. For more information, please refer to Regions and Available Areas. |
| Computing Resource |
Check the Reserve Resources Now option if you want to allocate the specified GPUs immediately.
If left unchecked, your notebook will be provisioned elastically, based on resource availability (see the Elastic Notebook section for details). For more information about machine specifications, please refer to Specification List. |
| Image (*Only for reserved GPU*) | Specify the desired image, which provide ready-to-use packages for machine learning frameworks such as PyTorch, Tensorflow and Scikit. |
| Workspace Volume |
You can either create a new volume, or specify an existing volume to persist your data under `/home/jovyan` directory (default Jupyter Notebook workspace) For more information, please refer to Volume. |
| Data Volumes |
You can add between 0 and 10 additional data volumes to your notebook server. You can either create a new volume, or specify an existing volume to persist your data under your desired mount path For more information, please refer to Volume. |
- After the setup is finished and reviewing your configurations, click "Launch" to create your notebook.
- Wait for the notebook instance to be ready. Once the status changes to Running, your notebook is provisioned and ready for use.
- Click the Connect button to launch the Jupyter Notebook interface in your browser. Start working on your projects immediately.